Expanding a home you plan to live in for decades requires a completely different mindset than renovating for quick resale value. When you are building a main-floor primary suite for aging in place, adding a second story for growing children, or bumping out a cramped kitchen for extended family gatherings, surface finishes matter far less than the structural integrity and daily safety hidden behind the walls. A rushed expansion can introduce subtle hazards that compromise your family’s health and your property’s longevity, including uneven foundation settling, hidden roof leaks, stagnant indoor air, overloaded mechanical equipment, and everyday trip-and-fall risks.
Treating your addition as a fully integrated extension of your existing home—rather than a standalone box bolted onto the side of the structure—protects every generation under your roof. That means sequencing site preparation, structural tie-ins, weatherproofing, climate control, vertical circulation, and interior surfaces in the right order before a single wall is closed up. By understanding where residential additions commonly fail and knowing which technical standards to demand from your design and construction team, you can turn a complex remodeling project into a safe, durable sanctuary built to serve your family for decades.
Clear Roots and Overhanging Limbs Before Excavating Near Your Home

Before any excavator breaks ground in your yard, carefully evaluate everything growing above and below the soil line. Mature trees add shade, privacy, and curb appeal, yet their root networks frequently extend two to three times beyond the outer edge of the canopy. When trenching for new footings severs major structural roots—or when decaying roots rot beneath a newly poured slab—voids form in the subsoil and trigger uneven settling. Always call 811 to mark underground utility lines, check local municipal tree-preservation ordinances, and schedule professional tree clearing to remove diseased trees, stumps, and invasive root networks inside the building footprint before excavation begins.
- Inspect root flares and lower trunks for signs of internal decay, fungal growth, hollow cavities, or heaving soil that could compromise nearby foundation walls during severe storms.
- Grind stumps completely below grade and backfill excavated root cavities with engineered, compacted structural fill rather than loose topsoil that will wash out or sink over time.
- Install high-visibility protective fencing around mature trees you intend to preserve so heavy delivery trucks, dumpsters, and machinery do not compact their shallow feeder roots.
- Hire certified tree trimming services to prune deadwood and cut back overhanging limbs at least 10 to 15 feet from the planned roofline before framing crews arrive on site.
- Grade the surrounding yard at a minimum 5 percent slope away from the new foundation perimeter so heavy rainwater drains naturally toward storm swales rather than pooling against basement or crawlspace walls.
Creating proper canopy clearance protects both your construction crew and your finished structure over the long haul. Removing heavy overhead branches prevents wind-snapped limbs from crashing onto exposed roof trusses during construction, keeps wet leaves and pine needles from clogging new gutters and causing fascia rot, and eliminates easy bridges for squirrels, raccoons, and wood-destroying insects to reach attic vents.
Pour Reinforced Footings in Tight Spaces Without Disrupting Existing Soil
An addition is only as reliable as the structural connection between its new foundation and your original house. When new footings sit shallower than the existing foundation or rest on disturbed earth, differential settlement occurs—leading to diagonal drywall cracks, jammed door frames, sticking windows, and separated trim along the transition wall. Require a geotechnical soil bearing evaluation before pouring concrete, and ensure all new footings extend below your local frost line while tying directly into the original foundation wall with epoxied rebar dowels.
Delivering concrete from the street to a backyard or narrow side-yard excavation also poses serious site safety risks. Fully loaded ready-mix trucks weigh tens of thousands of pounds and can crack existing driveways, crush septic drain fields, or collapse shallow water and sewer trenches if driven across a residential lawn. Working with a foundation concrete pumping service solves both access and structural quality challenges by transporting concrete cleanly over fences, garages, or landscaped beds through articulated booms or flexible ground lines.
- Verify that excavation crews stop at undisturbed native soil rather than over-digging and backfilling with loose dirt beneath load-bearing footings and stem walls.
- Install continuous perimeter footing drains wrapped in non-woven filter fabric and sloped to daylight or a dedicated sump basin to relieve hydrostatic groundwater pressure.
- Schedule a continuous pour so the footing concrete cures monolithically without weak cold joints that allow moisture or soil gases to seep into basements or crawlspaces.
- Apply exterior damp-proofing membranes and dimpled drainage boards along below-grade foundation walls to keep subterranean moisture from migrating into finished lower-level living spaces.
- Confirm compressive strength specifications, rebar overlap, and anchor-bolt spacing through municipal inspection before framers install pressure-treated sill plates.
Seal the Building Envelope to Stop Leaks, Drafts, and Moisture Intrusion
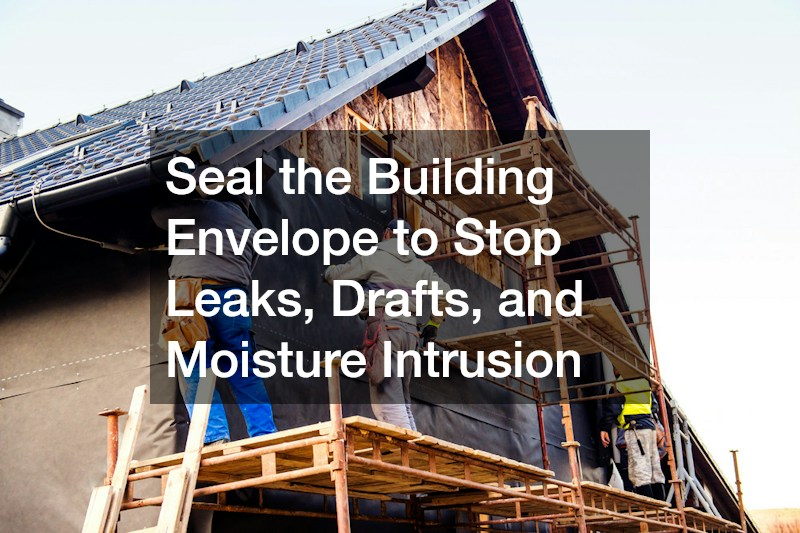
Where new framing meets an existing exterior wall or roofline, rainwater and melting snow naturally seek a path indoors. Poorly integrated flashing and trapped condensation rarely announce themselves with dramatic leaks overnight; instead, they silently rot structural sheathing, ruin cavity insulation, and foster hidden mold growth behind finished walls. Vetting licensed roofing contractors early in the architectural planning phase ensures your new roof pitch, valley geometry, and attic ventilation tie cleanly into the original roof deck rather than creating dead-end pockets that trap water and debris.
- Strip back existing siding and shingles along the tie-in zone so housewrap, step flashing, and kick-out flashing layer shingle-fashion to direct water outward onto the roof surface.
- Apply self-adhering ice-and-water shield membranes across all roof valleys, eaves, and low-slope transitions to block wind-driven rain and destructive winter ice dams.
- Maintain unobstructed soffit-to-ridge attic ventilation so warm, humid household air cannot condense on cold roof sheathing during freezing winter weather.
- Partner with an experienced insulation company to seal rim joists, top plates, plumbing chases, and electrical penetrations with air-impermeable foam before insulating exterior walls.
- Specify continuous exterior rigid foam sheathing in cold or mixed climates to eliminate thermal bridging through wood studs and keep interior wall surfaces warm and dry.
Airtightness and fire safety work hand in hand inside a properly detailed building envelope. Modern residential building codes require solid draft stops and fire blocking at floor, wall, and ceiling intersections so flames and toxic smoke cannot race unimpeded from an older basement or attic into a new wing. Sealing those hidden framing cavities lowers monthly utility bills, eliminates uncomfortable winter drafts, and gives your family critical extra minutes to exit safely in an emergency.
Recalculate Heating and Cooling Loads Instead of Overworking Your Old System

Extending existing supply ducts into a brand-new family room, sunroom, or upper level is one of the most common shortcuts in residential remodeling—and one of the fastest ways to undermine indoor comfort and air quality. Your original furnace and condenser were engineered for your home’s original square footage, window count, and insulation performance. Tapping into older trunk lines starves distant rooms of airflow, forces equipment to short-cycle prematurely, and leaves sunlit additions stifling in July and chilly in January.
Before finalizing mechanical blueprints, insist on a room-by-room Manual J load calculation that accounts for solar orientation, window glazing, ceiling height, and daily occupancy. When planning air conditioning installation for your expanded square footage, compare high-efficiency zoned ductwork against variable-speed ductless mini-splits, which deliver precise temperature and humidity control without tearing apart finished ceilings in the original portion of your home.
- Include dedicated return-air pathways in every new bedroom and living area so closed doors do not create pressure imbalances that pull humid, unfiltered outdoor air through wall gaps.
- Coordinate with certified heat services to verify whether your existing furnace or boiler has sufficient reserve capacity or requires a dedicated secondary heating zone.
- Insulate and pressure-test all new ductwork routed through unconditioned attics, basements, or crawlspaces to prevent energy loss, dust infiltration, and condensation drips.
- Add dedicated mechanical ventilation—such as an energy recovery ventilator—when tightening the building envelope so fresh, filtered outdoor air circulates continuously without wasting conditioned energy.
- Install interconnected, hardwired smoke and carbon monoxide alarms with battery backups on every floor and inside every sleeping room, especially when adding fuel-burning equipment or an attached garage.
Engineer Safe Multi-Story Transitions for Kids, Pets, and Aging Adults
Whether your project adds a full second story, a split-level living area, or a sunken sunroom, stairs immediately become the highest-risk zone in the house. Human muscle memory relies on every step in a flight matching the exact height and depth of the step before it; even a quarter-inch discrepancy in riser height can cause an adult or child to misstep and fall. Hiring a specialized stair builder rather than leaving complex layout math to rough framers guarantees consistent geometry, solid stringer anchoring, and strict compliance with residential safety codes.
- Maintain uniform riser heights of no more than 7.75 inches and tread depths of at least 10 to 11 inches, with a clear width of at least 36 inches—or 42 inches to simplify furniture moves and accommodate a future stairlift.
- Mount continuous, graspable handrails on both sides of the staircase that return smoothly into the wall or newel post so sleeves, robes, and backpack straps cannot catch.
- Select commercial-grade stair and railing products engineered to meet the 4-inch sphere rule for baluster spacing, ensuring toddlers and small pets cannot slip through or get wedged between spindles.
- Choose treads with subtle visual contrast and slip-resistant bullnose edges so older relatives or family members with low vision can clearly distinguish each step.
- Integrate low-glare LED step lights or motion-activated riser illumination controlled by three-way switches at both landings for safe visibility after dark.
Pay equal attention to the landings at the top and bottom of every staircase. Building codes require at least 36 inches of clear, level landing space at both ends of a flight, and you should never design an interior or exterior door that swings directly out over the top step where someone could be knocked off balance.
Choose Slip-Resistant, Low-VOC Surfaces for High-Traffic Family Zones

Once framing, mechanicals, and drywall pass inspection, finish materials determine how safely your family moves through the new space every day. High-gloss porcelain tiles, slick prefinished planks, and raised metal transition bars may look sleek in online photos, but they quickly become fall hazards when wet shoes, spilled drinks, or sock-footed kids cross the room. Visiting a knowledgeable local flooring store allows you to inspect physical samples under natural and overhead lighting, feel surface textures firsthand, and verify technical safety ratings before ordering materials.
- Check Dynamic Coefficient of Friction ratings on tile and stone products—target a wet rating of 0.42 or higher in mudrooms, laundry rooms, and bathrooms where moisture is common.
- Require thorough subfloor leveling and flush T-moldings or custom reducer strips where new floors meet existing hardwood or tile, eliminating quarter-inch ridges that trip walkers, strollers, and bare feet.
- Specify GREENGUARD Gold or FloorScore-certified low-VOC flooring and adhesives to keep formaldehyde and harsh chemical off-gassing out of children’s bedrooms and family spaces.
- Consider cork, embossed luxury vinyl plank, or matte-finish engineered wood paired with cushioned acoustic underlayment in playrooms and aging-in-place suites to reduce joint fatigue and soften accidental falls.
- Install recessed walk-off entry mats at exterior addition doors so rain, snow, and mud stay contained at the threshold rather than tracking across hard-surface hallways.
A truly successful home addition does far more than add square footage—it reinforces the safety, comfort, and durability of the entire house around it. By addressing root and canopy clearance, soil stability, continuous weatherproofing, balanced climate control, ergonomic stair geometry, and slip-resistant interior surfaces in a logical sequence, you prevent costly structural repairs and everyday household accidents long before they happen.
Before signing construction contracts or breaking ground, walk your property with a detailed safety checklist, verify every contractor’s license and insurance coverage, and require municipal inspections at each milestone before walls are closed up. Taking time to build structural integrity and thoughtful, multi-generational safety features into the bones of your addition today ensures your forever home remains a healthy, resilient haven for your family for decades to come.